

First, we need issue SSL certificate. Startssl.com is a great way to install free signed SSL certifacate.
So, let’s signed up on Startssl.com with browser authenticate.
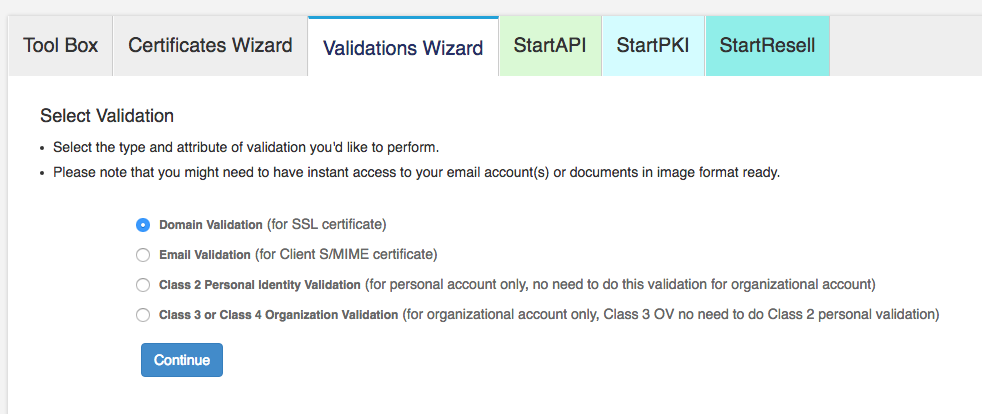
Then, go to control panel (https://startssl.com/ControlPanel) and click on Validations Wizard tab.
Select Domain Validation option.

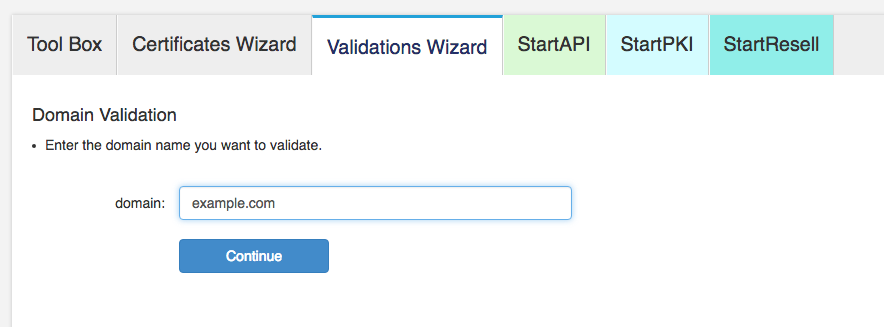
Next, enter your domain name:

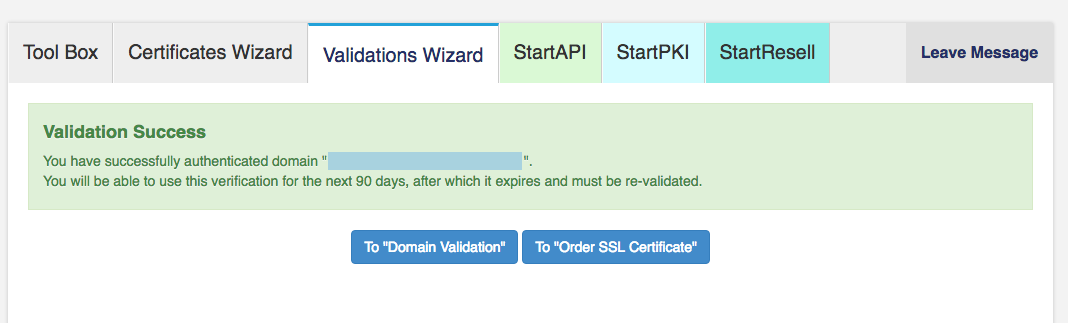
You will be asked to verify your domain via email.
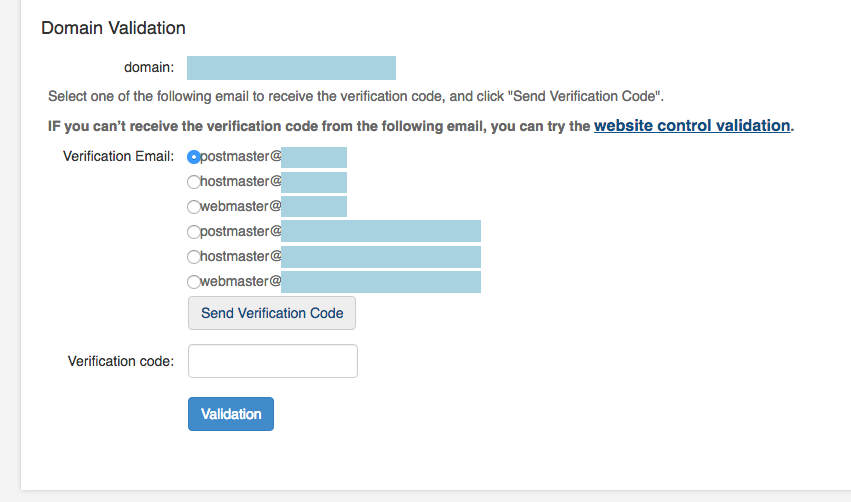

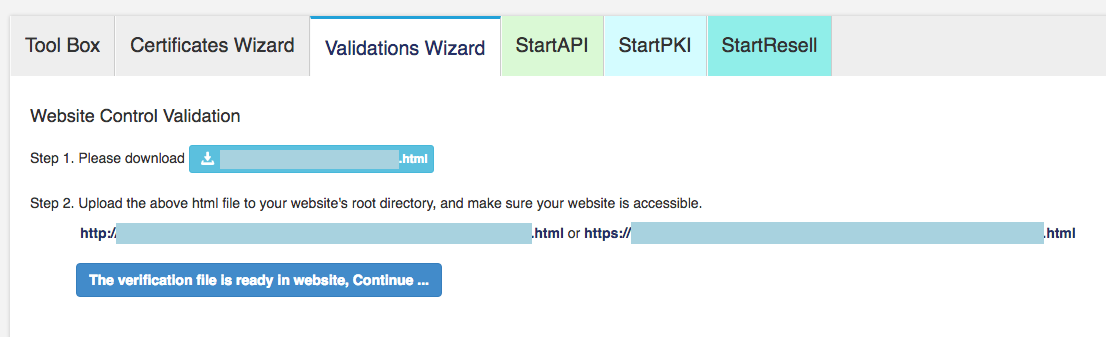
IF you can’t receive the verification code from the following email, you can try the website control validation.

Then click ‘To order SSL certificate’.

You should see Certificate Wizard page.

Enter your full domain name, e.g. profile.example.com.
Now we need to generate Certificate Signing Request (CSR) file on our server.
Open your server terminal by ssh.
If you haven’t /etc/nginx/ssl directory, create it:
|
1 |
mkdir /etc/nginx/ssl |
Generate the CSR file:
|
1 |
sudo openssl req -nodes -newkey rsa:2048 -keyout /etc/nginx/ssl/your-full-domain-name.com.key -out /etc/nginx/ssl/your-full-domain-name.com.crt |
You will be asked a few questions about your server in order to embed the information correctly in the certificate.
|
1 2 3 4 5 6 7 |
Country Name (2 letter code) [AU]:US State or Province Name (full name) [Some-State]:New York Locality Name (eg, city) []:New York City Organization Name (eg, company) [Internet Widgits Pty Ltd]: Some Company, Inc. Organizational Unit Name (eg, section) []: Some Company Unit Name Common Name (e.g. server FQDN or YOUR name) []:example.com Email Address []:admin@example.com |
Next, you will be promt to enter the ‘extra’ attributes.
|
1 2 3 4 |
Please enter the following 'extra' attributes to be sent with your certificate request A challenge password []: An optional company name []: |
If you enter challenge password then you will be asked about this password every time during nginx restart.
We skip this steps in our case.
Copy crt file data:
|
1 |
cat /etc/nginx/ssl/you-full-domain-name.com.crt |
Return to Certificate Wizard page and paste this data to “Generated by Myself” option text area.
Click “Submit” button.
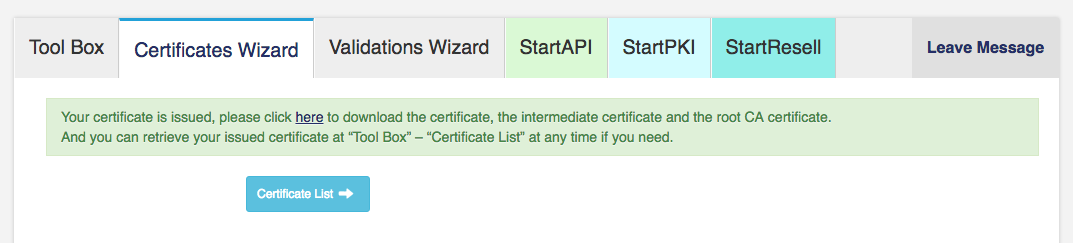
If everything was done correctly you will see successfully issued certificate page.
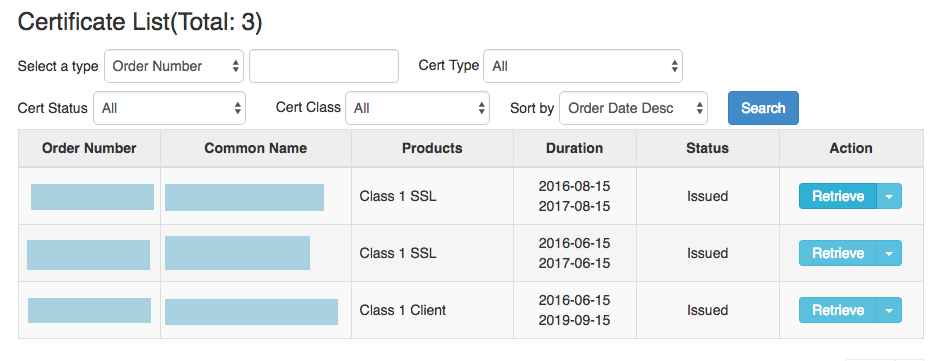
Click to “certificate list” and retrieve you brand new certificate.

Download your certificates files archive.
Install certificate on nginx.
Extract your downloaded certificate files archive.
Upload new csr certificate to /etc/nginc/ssl with the following command:
|
1 |
scp /path_to_you_certificate_folder/1_you_full_domain_name.com_bundle.crt root@ip_address:/etc/nginx/ssl/ |
Add to your host nginx config the following lines:
|
1 2 3 4 5 6 7 8 9 10 11 12 13 14 15 16 17 18 |
server { listen 80 default_server; listen [::]:80 default_server ipv6only=on; listen 443 ssl; server_name your_domain.com; root /usr/share/nginx/html; index index.html index.htm; ssl_protocols TLSv1 TLSv1.1 TLSv1.2; ssl_certificate /etc/nginx/ssl/nginx.crt; ssl_certificate_key /etc/nginx/ssl/nginx.key; location / { try_files $uri $uri/ =404; } } |
Restart nginx:
|
1 |
service nginx restart |
Conclusion
Now you have successfully installed free signed SSL certificate on your website that you can you use to safely transmit data.